How to Create the Perfect Habitat for Your Coral Shrimp
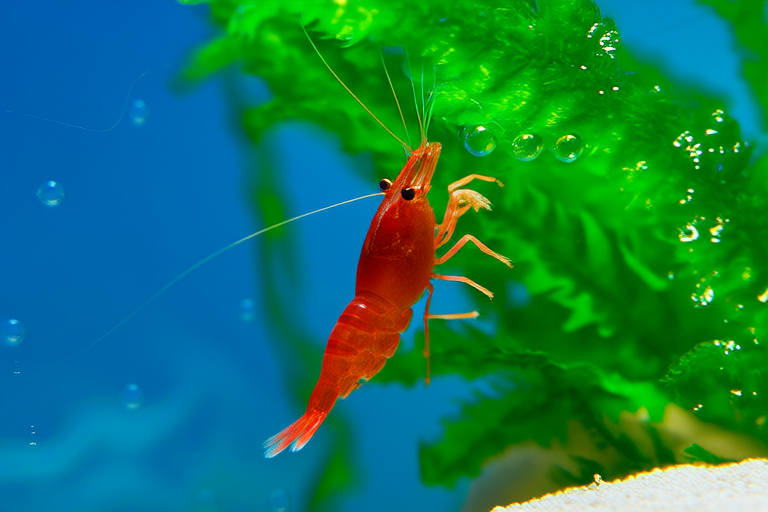
Coral shrimp are fascinating creatures that can add color and life to any aquarium. These small, vibrant shrimp are popular among aquarists due to their unique appearance and relatively low maintenance. However, creating the perfect habitat for your coral shrimp requires careful planning and attention to detail. This guide will walk you through setting up the ideal environment, ensuring optimal water conditions, selecting compatible tank mates, and providing the necessary care to keep your coral shrimp healthy and thriving.
Aquarium Setup
The first step in creating a suitable habitat for your coral shrimp is to choose an appropriate aquarium. Coral shrimp thrive in environments that mimic their natural habitats. A minimum tank size of 10 gallons is recommended for a small group of coral shrimp, but larger tanks provide more space for exploration and growth. Ensure the tank has a secure lid to prevent escape, as these shrimp are skilled climbers.
Substrate is another crucial aspect of the aquarium setup. Coral shrimp prefer fine sand or crushed coral substrate, which mimics their natural sandy or reef environments. Avoid using gravel or coarse substrates that could injure their delicate bodies. Additionally, adding live rock provides hiding spots and encourages beneficial bacteria growth, contributing to a healthier ecosystem.
Water Parameters
Maintaining proper water parameters is vital for the health and longevity of your coral shrimp. The ideal temperature range for coral shrimp is between 72°F and 82°F (22°C to 28°C). Consistent temperature control is achieved by using a reliable heater and thermometer. Regular monitoring with a high-quality thermometer ensures stability within this range.
pH levels should be maintained between 8.0 and 8.4, reflecting the slightly alkaline nature of most marine environments. To achieve and maintain this pH level, consider using a buffering agent like marine salt mix, which also helps regulate water hardness. Aim for a specific gravity of approximately 1.023 to 1.025, indicating the correct salinity level.
Water hardness should be kept within the range of 8 to 12 dKH (degrees of carbonate hardness). This parameter is crucial for maintaining stable pH levels and supporting the shrimp’s physiological processes. Use a water testing kit to regularly check these parameters and make adjustments as needed.
Filtration Systems
An efficient filtration system is essential for maintaining clean and healthy water conditions. Coral shrimp are sensitive to poor water quality, so investing in a high-quality filter is important. Choose a filter that provides mechanical, biological, and chemical filtration. Mechanical filtration removes debris and uneaten food, while biological filtration supports beneficial bacterial colonies that break down waste products. Chemical filtration helps remove dissolved organic compounds and other pollutants.
Canister filters or sponge filters are popular choices for coral shrimp tanks. They offer effective filtration without creating strong water currents that might stress the shrimp. Additionally, incorporate a protein skimmer if possible, especially in larger tanks. Protein skimmers help remove excess nutrients from the water, preventing algae blooms and maintaining water clarity.
Lighting Requirements
Proper lighting is critical for simulating natural day-night cycles and promoting photosynthesis in any live plants or corals within the tank. Coral shrimp do not have specific lighting requirements, but they benefit from a consistent light schedule. A 10- to 12-hour photoperiod is generally sufficient. LED lights are highly recommended for their energy efficiency and ability to produce a full spectrum of light.
If you plan to include live plants or corals, ensure the lighting meets their specific needs. Many coral shrimp enthusiasts also appreciate the aesthetic appeal of colorful lighting options, such as blue or actinic lighting, which enhances the vibrant colors of the shrimp. However, avoid overly intense or long-duration lighting, as it may cause stress or bleaching of corals.
Suitable Tank Mates
Selecting compatible tank mates is crucial to maintaining a peaceful and healthy community. Coral shrimp are generally peaceful and can coexist with various species. However, it is important to avoid aggressive or predatory fish that might harm the shrimp. Some suitable tank mates include:
- Small, peaceful fish like neon tetras, guppies, or dwarf gouramis
- Other invertebrates like hermit crabs or snails
- Non-aggressive corals and anemones
Avoid housing coral shrimp with larger, more aggressive fish or invertebrates that may compete for food or pose a threat. It is also advisable to introduce new tank mates gradually to minimize stress and potential conflicts.
Dietary Needs
Feeding your coral shrimp properly is key to their well-being. In the wild, coral shrimp feed on algae, detritus, and small organisms. In captivity, they can thrive on a varied diet that includes algae wafers, sinking pellets, and occasional treats of frozen or freeze-dried foods like brine shrimp or bloodworms. Offer small amounts of food daily, allowing them to scavenge and graze throughout the day.
Ensure that any uneaten food is removed promptly to prevent water pollution. Feeding too much or too frequently can lead to overfeeding, causing water quality issues and potentially harming the shrimp. A balanced diet supports their growth, reproduction, and overall health.
Maintaining Water Quality
Regular maintenance is essential for sustaining optimal water quality. Perform partial water changes every two weeks, replacing about 10-20% of the total volume. This process helps dilute harmful substances and replenishes essential minerals. Use a high-quality water conditioner to treat tap water before adding it to the tank, removing chlorine, chloramines, and heavy metals.
Additionally, monitor and clean the filtration system regularly. Clogged filters can reduce their effectiveness and lead to poor water quality. Replace filter media as recommended by the manufacturer and clean the external components of the filter. Skimmer collection cups should be emptied daily to prevent nutrient buildup.
Ensuring Health and Longevity
To ensure the health and longevity of your coral shrimp, pay close attention to their behavior and physical condition. Healthy coral shrimp are active, brightly colored, and exhibit normal feeding patterns. Signs of distress or disease include lethargy, pale or discolored bodies, loss of appetite, or erratic swimming.
If you notice any concerning symptoms, isolate the affected shrimp in a quarantine tank and consult with a veterinarian specializing in aquatic animals for diagnosis and treatment. Maintaining pristine water conditions, offering a nutritious diet, and avoiding sudden environmental changes contribute significantly to their overall health.
Gradual Acclimation
When introducing new coral shrimp to an existing habitat, gradual acclimation is crucial. Rapid changes in water parameters can cause stress and potentially fatal shock. Start by floating the sealed bag containing the new shrimp in the aquarium water for about 15 minutes to equalize temperatures. Then, slowly add small amounts of aquarium water to the bag, letting it sit for another 15 minutes each time, over a period of 60-90 minutes.
Once the shrimp are acclimated, gently net them out of the bag and into the main tank. Avoid releasing the water from the bag directly into the aquarium, as it may introduce unwanted contaminants. By following these steps, you ensure a smooth transition for the new arrivals and minimize the risk of disrupting the established tank ecosystem.