- Introduction
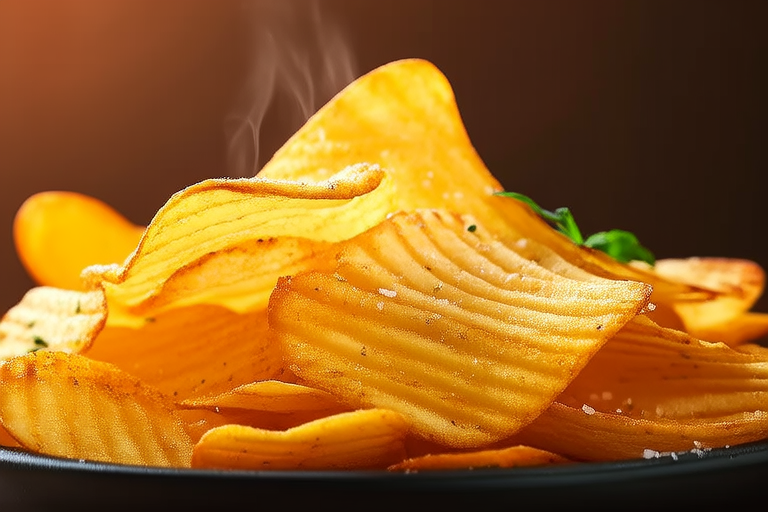
In the realm of culinary delights, few snacks can match the sheer simplicity and indulgence of homemade potato chips. These crispy, golden wedges not only offer a delightful crunch but also allow for an exploration of flavors that store-bought versions often lack. This guide aims to demystify the process of making your own crunchy perfection at home, offering insights into selecting the right potatoes, mastering the art of cutting, and achieving the perfect crispiness. Whether you’re a seasoned chef or a novice in the kitchen, this recipe promises to elevate your snack game to new heights.
- Selecting the Right Potatoes
The foundation of any great potato chip lies in the quality of its ingredients. While many might assume that any old spud will do, the truth is that certain varieties are better suited for chipping than others. Russet potatoes, with their high starch content and low moisture levels, are often considered the gold standard for homemade chips. Their dense flesh holds up well during frying, ensuring that each chip remains crisp and not greasy.
However, if you prefer a slightly softer texture, Yukon Golds or Red Bliss potatoes can be excellent alternatives. These varieties offer a balance between starch and moisture, resulting in chips that are both satisfyingly crunchy and subtly tender. It’s important to note that the freshness of your potatoes plays a crucial role as well. Opt for potatoes that are firm to the touch, free from sprouts, and without any signs of bruising or soft spots.
Additionally, consider the size of the potatoes when preparing them. Larger potatoes tend to yield more chips and are easier to slice uniformly, which is key to achieving consistent results. Smaller potatoes can be used too, but they may require more careful handling to avoid uneven slicing.
- Preparing the Potatoes
Once you’ve selected your potatoes, it’s time to prepare them for slicing. Begin by washing the potatoes thoroughly under cool running water to remove any dirt or debris. Scrubbing them gently with a vegetable brush can help ensure that no grit remains on the surface.
Next, peel the potatoes if desired. While some prefer the rustic look of unpeeled chips, peeling can enhance the crispness and color of the final product. If you choose to peel, do so carefully to retain as much of the flesh as possible.
After peeling, cut the potatoes lengthwise into quarters or eighths, depending on their size. This step helps to reduce the amount of time needed for slicing and ensures that all pieces are of similar thickness. Once quartered, use a mandoline slicer or a sharp knife to slice the potato pieces into thin, even rounds. The ideal thickness for potato chips ranges between 1/16 to 1/8 inch. Consistent slicing is crucial for achieving uniform cooking times and texture.
To prevent the slices from darkening due to oxidation, immediately submerge them in cold water after slicing. This step also helps to remove excess starch, which can lead to greasy chips. Allow the slices to soak for about 30 minutes before draining them thoroughly. Patting the slices dry with paper towels is essential to ensure they fry evenly and become crisp.
- Cutting and Preparing the Chips
Once the potatoes have been sliced and soaked, it’s time to dry them thoroughly. Excess moisture on the slices can lead to soggy chips, so this step is critical. Use clean kitchen towels or a salad spinner to gently pat the slices dry. For best results, lay the slices out on a clean kitchen towel and press down lightly with another towel to absorb any remaining moisture.
If you’re looking to add an extra layer of flavor, now is the perfect time to season your chips. A classic choice is salt, but feel free to experiment with other seasonings such as garlic powder, paprika, or chili flakes. For a truly gourmet touch, consider using a spice grinder to create your own custom seasoning blends. Sprinkle the seasoning evenly over the slices, ensuring that each piece is coated lightly yet thoroughly.
Before frying, it’s advisable to let the seasoned slices rest for about 15 minutes. This allows the seasoning to adhere better and intensifies the flavors. During this time, preheat your oil to the appropriate temperature. For traditional fried chips, aim for an oil temperature of around 350°F (175°C). Using a deep-fry thermometer can help you monitor the oil temperature accurately. Alternatively, if you prefer a healthier option, you can opt for baking your chips in the oven at 400°F (200°C) for about 15-20 minutes, flipping them halfway through.
- Frying the Chips
Frying is the cornerstone of achieving those coveted crunchy potato chips. The key to success lies in maintaining the oil at a steady temperature and ensuring that the slices are fully submerged during the process. For optimal results, use a deep, heavy-bottomed pot filled with enough oil to completely cover the potato slices. Canola oil is a popular choice due to its neutral flavor and high smoke point, but peanut oil or sunflower oil can also work well.
When the oil reaches the desired temperature, carefully lower the seasoned potato slices into the hot oil using a slotted spoon or spider skimmer. Be cautious not to overcrowd the pot, as this can cause the temperature to drop and result in uneven cooking. Fry the chips in small batches, turning them occasionally with tongs to ensure even browning. Each batch should take approximately 3-5 minutes to reach a golden brown color and achieve that perfect crunch.
Once the chips are done, use a slotted spoon to transfer them to a wire rack or paper towels to drain excess oil. This step is crucial for preventing the chips from becoming soggy. Allow them to cool slightly before enjoying. The cooling process further enhances the crispiness, as the residual heat causes the moisture inside the chips to evaporate.
- Baking the Chips
For those seeking a healthier alternative to fried chips, baking offers a delicious and crispy option. Begin by preheating your oven to 400°F (200°C). Line two large baking sheets with parchment paper to prevent sticking and ensure even heating. Arrange the seasoned potato slices in a single layer on the prepared baking sheets, leaving a small space between each slice for air circulation.
Bake the chips for about 15-20 minutes, rotating the baking sheets halfway through the cooking time to ensure even browning. The exact timing may vary depending on the thickness of the slices and the specific oven model. Keep a close eye on the chips towards the end of the baking period to avoid burning. When they reach a golden brown color and are crisp to the touch, remove them from the oven and let them cool slightly before serving.
- Serving Suggestions
Homemade potato chips are versatile and can be enjoyed in countless ways. Serve them as a standalone snack, accompanied by a variety of dips such as sour cream and chives, ranch dressing, or guacamole. For a more sophisticated presentation, consider pairing them with artisanal cheeses or cured meats. You can also experiment with infused oils or flavored salts to create unique and memorable flavor combinations.
Another creative idea is to incorporate homemade chips into salads or sandwiches. Their crunch adds an appealing textural contrast to leafy greens, grilled chicken, or smoked salmon. Additionally, consider using them as a garnish for soups or stews, adding a burst of flavor and texture to each bite.
- Storage Tips
Proper storage is essential to maintain the crispness of your homemade potato chips. Once cooled, transfer the chips to an airtight container or resealable plastic bag. Store them in a cool, dry place away from direct sunlight. For best results, consume the chips within a week. If you find them starting to lose their crunch, you can revive them by placing them in a warm oven for a few minutes.
By following these tips and techniques, you’ll be able to enjoy consistently delicious and crispy homemade potato chips whenever the craving strikes. Whether you’re hosting a party, enjoying a quiet evening at home, or simply looking for a satisfying snack, these crunchy perfection potato chips are sure to impress.


