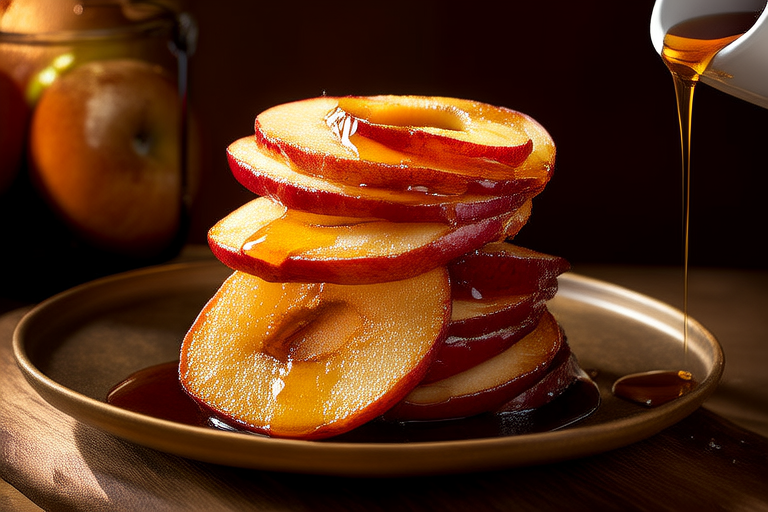
Sweet Escape: Baked Apple Chips
Welcome to Sweet Escape, your go-to destination for all things delicious and nutritious in the world of baking. Today, we’re diving into a delightful and healthy treat that’s perfect for those seeking a sweet escape from the everyday hustle and bustle – Baked Apple Chips.
Introduction to Baked Apple Chips
Apple chips have gained significant popularity in recent years as a healthy snack alternative. Unlike traditional fried potato chips, these baked apple slices offer a crispy texture without the unhealthy fats and excessive calories. They are not only a guilt-free indulgence but also packed with essential nutrients like fiber, vitamins A and C, and antioxidants.
The process of making baked apple chips is straightforward yet rewarding. By carefully selecting the right type of apples and using the correct baking techniques, you can achieve a perfect balance of crispiness and sweetness. This recipe will guide you through every step, ensuring that your homemade apple chips are as delicious as they are visually appealing.
Selecting the Right Apples
The first and most crucial step in creating the best baked apple chips is selecting the right variety of apples. While almost any apple can be used, certain types yield better results due to their natural sugar content and moisture levels.
- Granny Smith: Known for its tartness and firm texture, Granny Smith apples are excellent for baking. Their high acidity helps prevent browning, while their dense flesh ensures crispiness after baking.
- Rome Beauty: These apples have a thin skin and low water content, making them ideal for drying. They produce a beautifully crisp chip with a mild flavor.
- Fuji: Fuji apples are a popular choice due to their sweet taste and crisp texture. They retain their shape well during baking and provide a satisfying crunch.
- Gala: Gala apples are another great option, offering a balance between sweetness and tartness. Their natural sugars caramelize beautifully when baked.
Regardless of which variety you choose, ensure that the apples are fresh and free from bruises or blemishes. For optimal results, select apples that are slightly firmer than usual, as softer apples may become too mushy during the baking process.
Preparation and Cutting Techniques
Once you’ve selected your apples, it’s time to prepare them for baking. The key to achieving perfectly crisp apple chips lies in the preparation and cutting techniques.
- Clean and Peel: Wash the apples thoroughly under running water to remove any dirt or pesticides. Depending on your preference, you can either peel the apples or leave the skin intact. Peeling the apples will result in a cleaner, more uniform look, while leaving the skin on adds an extra layer of nutrition and color.
- Core and Slice: Remove the core of each apple using an apple corer or a small knife. Then, slice the apples into thin, even rounds. Aim for slices that are approximately 1/8 inch thick. Consistent thickness is crucial for even baking and crisping.
- Remove Seeds: Carefully remove any seeds from the center of each slice to avoid bitter flavors in your finished product.
- Arrange on Baking Sheets: Line several baking sheets with parchment paper or silicone mats to prevent sticking. Arrange the apple slices in a single layer, ensuring they do not overlap. Leave some space between each slice to allow for proper air circulation during baking.
By following these steps, you’ll set yourself up for success in creating a batch of deliciously crisp apple chips.
Baking Process
Now comes the exciting part – baking the apple slices to perfection. Proper baking techniques are essential for achieving the desired crispiness and sweetness.
- Preheat the Oven: Preheat your oven to 200°F (93°C). This low temperature ensures that the apples dry out slowly, resulting in a crispy texture rather than becoming overly browned or burnt.
- Bake: Place the prepared baking sheets in the preheated oven. Bake the apple slices for about 2-3 hours, rotating the trays halfway through the baking time to ensure even drying. The exact baking time may vary depending on the thickness of the slices and the specific type of apple used.
- Check for Doneness: After 2-3 hours, check the apple slices for doneness. They should be fully dried and crispy, with no soft spots remaining. If they are still slightly moist, continue baking in 15-minute increments until they reach the desired crispness.
- Allow to Cool: Once the apple chips are fully baked, remove them from the oven and let them cool completely on the baking sheets. As they cool, they will become even crispier.
By carefully monitoring the baking process and adjusting the time as needed, you can ensure that your apple chips turn out perfectly crispy and flavorful.
Enhancing Flavor with Seasonings
To elevate the basic baked apple chips to new heights, consider adding a touch of seasoning. There are numerous ways to enhance the natural sweetness and flavor of the apples, depending on your personal preferences.
- Cinnamon Sugar: Sprinkle cinnamon sugar over the apple slices before baking for a warm, spiced flavor. Combine 1 tablespoon of ground cinnamon with 1/4 cup of granulated sugar, and dust the slices generously.
- Lemon Zest: For a zesty twist, add freshly grated lemon zest to the apple slices. This citrusy addition complements the sweetness of the apples and adds a refreshing tang.
- Maple Syrup: Drizzle a light coating of maple syrup over the slices before baking for a rich, caramelized flavor. Be cautious not to use too much syrup, as it can cause the slices to become overly sticky.
- Nuts and Seeds: Add crushed nuts or seeds, such as almonds, walnuts, or sunflower seeds, for a crunchy texture and additional nutrients.
Experiment with different seasonings to find your favorite combination. Whether you prefer a classic cinnamon-sugar blend or a more adventurous mix of spices, there’s a seasoning to suit every palate.
Storage and Serving Suggestions
Proper storage is essential to maintain the crispiness and freshness of your baked apple chips. Store the cooled apple chips in an airtight container at room temperature for up to one week. Alternatively, you can store them in the freezer for up to three months.
When it comes to serving suggestions, the possibilities are endless. Enjoy your homemade apple chips as a standalone snack or pair them with a variety of dips, such as peanut butter, yogurt, or cheese. You can also incorporate them into salads, oatmeal, or trail mixes for added crunch and flavor.
Conclusion
Creating baked apple chips at home is a simple yet rewarding process that allows you to enjoy a healthy, tasty snack anytime. With the right apple selection, careful preparation, and thoughtful seasoning, you can craft a batch of apple chips that will satisfy your cravings and impress your friends and family. So why not take a sweet escape into the kitchen today and give this recipe a try? Your taste buds will thank you!


