Top 10 Health Tips for Keeping Your German Shepherd Happy and Healthy
German Shepherds are known for their loyalty, intelligence, and strength. These dogs are also prone to certain health issues, which makes it essential for owners to be proactive about their health and well-being. In this article, we will discuss the top 10 health tips for keeping your German Shepherd happy and healthy. From diet and exercise to grooming and mental stimulation, these tips will help you ensure that your furry friend enjoys a long, healthy life.
1. Balanced Diet for Optimal Nutrition
Proper nutrition is crucial for the overall health of your German Shepherd. A balanced diet provides the necessary nutrients for energy, growth, and maintenance of body functions. High-quality dog food that meets the nutritional requirements set by the Association of American Feed Control Officials (AAFCO) is recommended. Consult with your veterinarian to determine the appropriate amount and type of food for your dog’s age, weight, and activity level.
German Shepherds require a diet rich in protein and fat to maintain muscle mass and support their active lifestyle. However, avoid overfeeding, as obesity can lead to various health problems, such as joint issues and diabetes. Incorporating fresh vegetables, fruits, and lean meats into your dog’s diet can provide additional nutrients and variety. Always introduce new foods gradually to prevent digestive upset.
2. Regular Exercise to Maintain Fitness
Exercise is vital for maintaining the physical and mental health of your German Shepherd. Regular physical activity helps prevent obesity, strengthens muscles and joints, and promotes cardiovascular health. German Shepherds are energetic dogs that need at least 90 minutes of daily exercise. This can include walking, running, playing fetch, or engaging in agility training.
In addition to physical benefits, exercise also aids in mental stimulation. Providing mental challenges through interactive toys or training sessions can help reduce boredom and destructive behaviors. Always supervise your dog during exercise to prevent injuries and monitor their activity level to avoid overexertion, especially on hot days.
3. Grooming for Skin and Coat Health
Regular grooming is essential for maintaining the skin and coat health of your German Shepherd. Their double coat requires weekly brushing to remove loose hair and prevent matting. Bathing should be done every 4-6 weeks, using a gentle dog shampoo to avoid stripping natural oils from the skin. Check for signs of skin irritation, such as redness, bumps, or excessive scratching, and consult your veterinarian if you notice any issues.
Trimming nails and cleaning ears regularly are also important aspects of grooming. Overgrown nails can cause discomfort and affect your dog’s gait, while dirty ears can lead to infections. Use appropriate tools and techniques for these tasks, or seek professional assistance if needed.
4. Mental Stimulation for Cognitive Function
Mental stimulation is just as important as physical exercise for your German Shepherd’s overall well-being. Engaging in activities that challenge their mind can improve cognitive function, reduce stress, and prevent boredom-related behaviors like chewing or digging. Puzzle toys, obedience training, and scent work are excellent ways to stimulate your dog’s brain.
Training sessions can also strengthen the bond between you and your pet. Positive reinforcement techniques, such as treats and praise, encourage good behavior and make learning enjoyable for both you and your dog. Consistency and patience are key when teaching new commands or tricks.
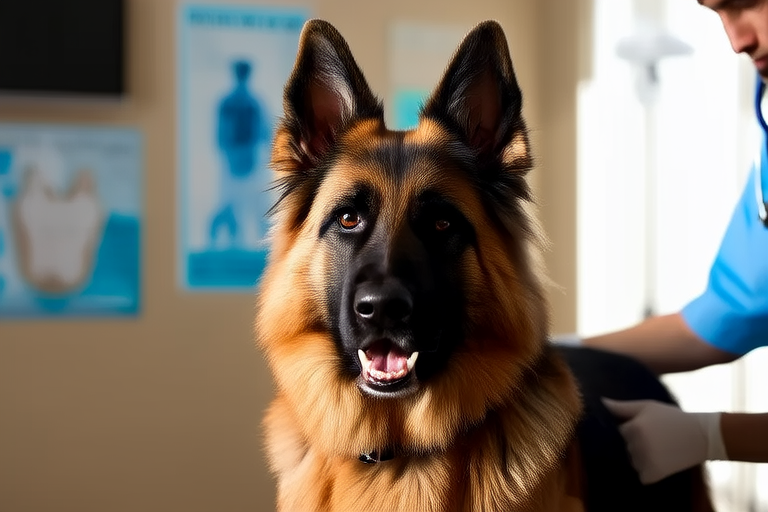
5. Veterinary Care for Early Detection
Scheduling regular check-ups with your veterinarian is crucial for early detection and management of potential health issues. Annual wellness exams allow veterinarians to monitor your dog’s overall health, catch any developing problems, and provide preventive care, such as vaccinations and parasite control.
Dental care is another important aspect of veterinary care. Poor dental hygiene can lead to gum disease and other serious health conditions. Brush your dog’s teeth regularly, or provide dental chews and toys to promote oral health. Professional dental cleanings may be necessary if your dog develops tartar buildup or gum disease.
6. Common Health Issues Prevention
German Shepherds are prone to several health issues, including hip dysplasia, elbow dysplasia, and degenerative myelopathy. To prevent these conditions, choose a reputable breeder who performs genetic testing on breeding dogs. Maintaining a healthy weight, providing proper nutrition, and ensuring adequate exercise can also help reduce the risk of joint problems.
Vaccinations and parasite control are essential for preventing infectious diseases and parasitic infestations. Follow your veterinarian’s recommendations for vaccinations and heartworm, flea, and tick prevention. Early intervention can prevent more severe health issues and improve your dog’s quality of life.
7. Training for Behavior Management
Training is an ongoing process that helps manage your German Shepherd’s behavior and ensure a harmonious relationship. Socialization is particularly important for puppies, as it helps them become comfortable around people, animals, and different environments. Expose your puppy to various stimuli under controlled conditions to build confidence and prevent fear-based aggression.
Consistent training using positive reinforcement techniques can help address behavioral issues, such as excessive barking or jumping. Establish clear rules and boundaries, and reward desired behaviors. Training not only improves behavior but also strengthens the bond between you and your dog.
8. Socialization for Emotional Well-Being
Socializing your German Shepherd is crucial for their emotional well-being. Exposing your dog to different people, animals, and environments helps them develop confidence and adaptability. Puppy classes are an excellent way to socialize your dog while providing structured training. Encourage positive interactions with strangers and other pets to foster friendly behavior.
Regular visits to dog parks or participation in group activities can also provide opportunities for socialization. Always supervise your dog during social encounters to ensure safety and prevent conflicts. Proper socialization can reduce anxiety and stress, leading to a happier, more well-adjusted dog.
9. Sleep Habits for Restful Nights
Adequate sleep is essential for your German Shepherd’s physical and mental health. Adult dogs typically require 12-14 hours of sleep per day, while puppies may need up to 18 hours. Creating a comfortable sleeping environment, such as a soft bed in a quiet area, can help your dog rest better. Establish a consistent bedtime routine to signal to your dog that it’s time to sleep.
Avoid disturbing your dog during sleep, as deep sleep is necessary for recovery and repair. If your dog has difficulty sleeping, consult your veterinarian to rule out underlying health issues or behavioral problems. Ensuring your dog gets enough rest can improve their mood and overall well-being.
10. Environmental Enrichment for Overall Well-Being
Providing an enriched environment can enhance your German Shepherd’s quality of life. Incorporate elements that stimulate their senses, such as scented toys or interactive feeders. Rotate toys periodically to keep things interesting and prevent boredom. Consider creating a designated play area with obstacles or tunnels for exploration and exercise.
Environmental enrichment can also include outdoor adventures, such as hiking or swimming. Exposure to nature and new experiences can provide mental and physical stimulation. Always prioritize safety and supervise your dog during outdoor activities to prevent accidents or injuries.
In conclusion, following these top 10 health tips can significantly contribute to the happiness and longevity of your German Shepherd. By focusing on nutrition, exercise, grooming, mental stimulation, veterinary care, common health issues prevention, training, socialization, sleep habits, and environmental enrichment, you can ensure that your beloved companion leads a healthy and fulfilling life. Remember, a healthy German Shepherd is a happy one!