The Gentle Giant Among Scorpions: Discovering the True Nature of Heterometrus Spinifer
In the vast and diverse world of arachnids, one species stands out not only for its impressive size but also for its relatively docile nature. The Heterometrus spinifer, commonly known as the Asian forest scorpion, has earned the nickname “gentle giant” due to its large size and generally calm demeanor. This article aims to explore the fascinating world of Heterometrus spinifer, shedding light on its physical attributes, habitat, diet, and behavior, while debunking common myths and discussing its role in biodiversity.
A Glimpse into the Gentle Giant
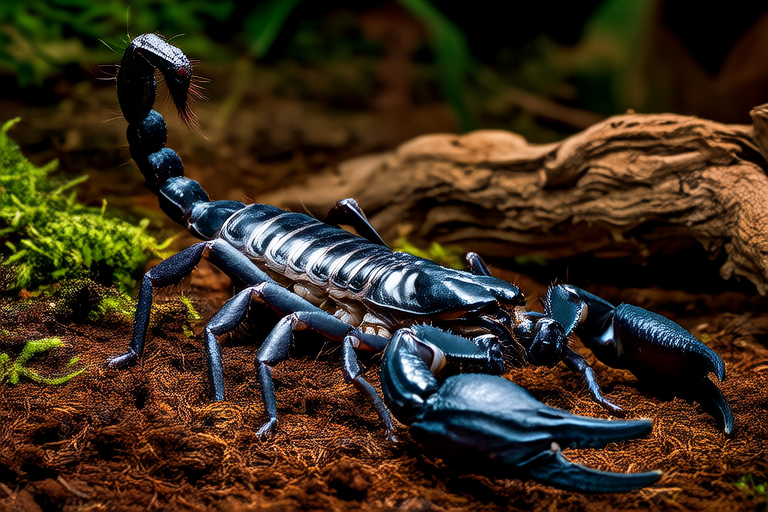
The Heterometrus spinifer is one of the largest scorpions, reaching lengths of up to 15 centimeters. This makes it significantly larger than most of its cousins, earning it the title of “gentle giant” among scorpions. Despite its imposing size, this species is not aggressive towards humans and rarely stings unless provoked. Their coloration varies from dark brown to black, providing excellent camouflage in their natural habitats.
Physical Characteristics
The Heterometrus spinifer boasts a robust body structure with a pair of large pincers (pedipalps) that are used for catching prey and defense. Its tail, or metasoma, is equipped with a venomous stinger at the tip. However, contrary to popular belief, the venom of the Heterometrus spinifer is not particularly potent and is more of a deterrent rather than a lethal weapon. The pincers are much more effective in capturing prey, which typically consists of insects and small vertebrates.
Habitat and Distribution
Native to Southeast Asia, the Heterometrus spinifer can be found in countries like Thailand, Malaysia, and Indonesia. These scorpions prefer humid environments, often residing in dense forests, caves, and under rocks. They are nocturnal creatures, active during the night when temperatures are cooler and moisture levels are higher, making it easier for them to hunt and avoid predators.
Diet and Behavior
The diet of the Heterometrus spinifer primarily consists of insects and small vertebrates, including mice and lizards. They are opportunistic feeders, consuming whatever prey they can catch. Their hunting strategy involves lying in wait for potential victims to come within reach, after which they use their pincers to capture and subdue the prey before injecting it with venom. Once the prey is immobilized, the scorpion uses its chelicerae to tear apart the flesh and consume it.
Despite their formidable appearance, these scorpions are quite docile and will avoid confrontation whenever possible. They are solitary animals, living alone except during mating season. Males engage in complex courtship rituals involving a dance-like series of movements, followed by copulation. Females carry their offspring on their backs until they molt for the first time, ensuring their safety during this vulnerable period.
Myths and Misconceptions
One of the most pervasive myths about scorpions, including the Heterometrus spinifer, is that they are highly aggressive and deadly. While it is true that all scorpions possess venom, the potency of this venom varies greatly between species. For the Heterometrus spinifer, the venom is mostly a defensive mechanism, designed to deter predators rather than kill. In fact, human fatalities from scorpion stings are extremely rare, and medical intervention is usually sufficient to treat any symptoms.
Another misconception is that scorpions always glow under ultraviolet light. While many scorpions do exhibit fluorescence, this is not universal across all species and does not serve any biological purpose. It is simply a byproduct of certain chemicals present in their exoskeletons.
Conservation Efforts and Biodiversity
Understanding the true nature of the Heterometrus spinifer is crucial for its conservation. As with many species, habitat destruction poses a significant threat to the survival of these gentle giants. Deforestation and urbanization have reduced the availability of suitable habitats, forcing scorpions to adapt or face extinction. Conservation efforts focus on preserving natural ecosystems and educating the public about the ecological roles of scorpions.
Scorpions play a vital part in maintaining ecosystem balance by controlling insect populations. By reducing the number of pests, they indirectly support plant life and other animal species. Moreover, studying scorpions can provide valuable insights into evolutionary biology and pharmacology. The venom of some scorpion species has been used to develop drugs for treating various medical conditions, including pain management and epilepsy.
Conclusion
The Heterometrus spinifer, with its gentle nature and impressive size, serves as a reminder of the diversity and complexity of life on Earth. By dispelling myths and misconceptions, we can foster a greater appreciation for these misunderstood creatures. Understanding and conserving species like the Heterometrus spinifer is essential for maintaining biodiversity and ensuring the health of our planet’s ecosystems. Let us embrace our curiosity and strive to learn more about the gentle giants among us.